This document will guide you through the configuration steps needed to enable interactions between the SlackApi and BusinessMate. To use the Slack methods in your workflow, you will need to use an ‘accessToken’ and ‘channel’ name.
How to get the accessToken
The first thing that needs to be done is to create your Slack application at their official website. Choose ‘Create an app’ or if you already have any other Slack app, you can also go to ‘Your apps’ (https://api.slack.com/).
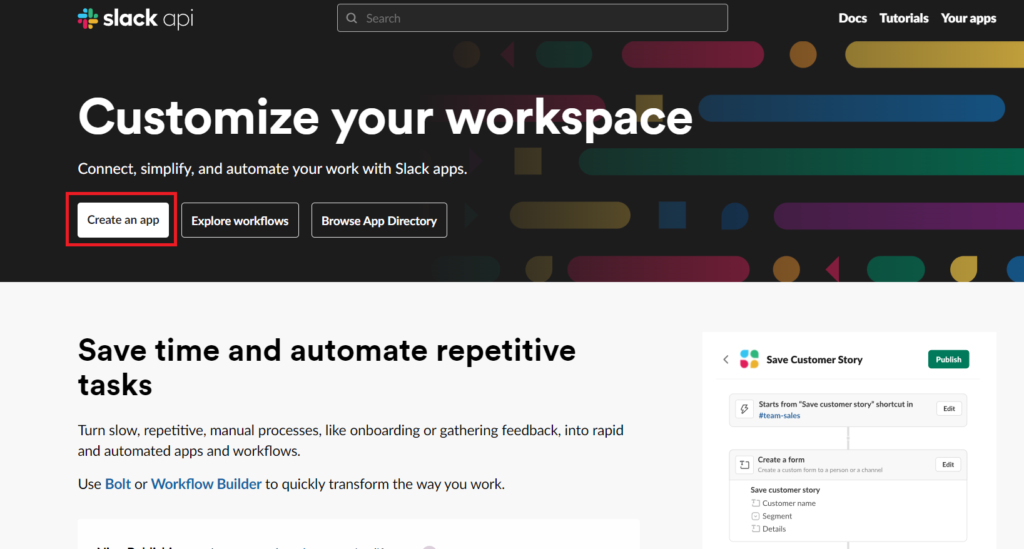
Figure 1. Slack api workspace
Create a new app
Once you’ve created your Slack developer login, go to ‘Create New App’ in the Your Apps section.

Figure 2. Your Apps
Create an app options menu 1
You will have the option either to create an app from ‘Scratch’ or ‘From an app manifest’. In this example, we will create an app from scratch. A manifest is a ‘yaml’ file which includes settings of a previous app. If you’re re-creating an app this option could be useful as it will save you some time.

Figure 3. Create app from scratch
Create an app options menu 2
Enter a name for your app and select a workspace if you already have one, or create a new one to be associated to your app. This name and workspace will be used later in your Slack desktop application, for step 2 of this guide.

Figure 4. Choose Name and workspace
App basic information page
Next, you’ll be forwarded to the Basic Information page, where you’ll be setting up your application.

Figure 5. Basic information page
Bots option
Scroll down until you see ‘Bots’, like shown in the following screen. For this example, we’ll create a bot application, so select that option.
Here you can read about the bot.
From there you will see, that we need to add permissions and scopes for the bot token.

Figure 6. Features
OAuth & Permissions
Now, you need to assign scopes to your bot. These settings can be done in the OAuth/Permission part of the site. In the ‘OAuth & Permissions’.

Figure 7. OAuth & Permissions
Assign a scope to your bot
Scroll down until you find Review Scopes to Add.

Figure 8. Assign scope
Bot Token Scopes – Add an OAuth Scope
Scopes are permissions that you can define to your application, depending on your needs. Press ‘Add an OAuth Scope’ button to start adding.

Figure 9. Add an OAuth Scope
Select and add scopes
For this example, we will select the following scopes. To use the current Slack methods available at BusinessMate, you need to provide write and read permissions to ‘SendMessage’ and ‘GetAllMessages’ respectively, to/from a channel.

Figure 10. Selected scopes
Install to Workspace
After scopes have been added, you can now install your application to workspace. Scroll up until you find ‘Install to Workspace’ button.

Figure 11. Install the new permissions
Allow permissions
Allow permissions request to finalize.

Figure 12. Confirm new persmissions
accessToken generated
You can now view and copy your OAuth Token, which will be used in your BusinessMate workflows as ‘accessToken‘.

Figure 13. accessToken
Create new channel
Now that you have you Slack ‘accessToken’ generated, it’s time to head over to your Slack desktop application. You should login to the same workspace selected previously.
We will create a new channel “mychannel” the bot can write to.
On the left pannel right click on Channels menu and click on “Create a new channel”, then enter the name.

Figure 14. Create new channel
Add bot to the channel
The last thing that needs to be done is to assign the bot you’ve created to your channel. For this, open your channel message box and start typing ‘@..’. You should find the app name. Select it and send a message.

Figure 15. Adding bot
Bot added to channel
You should be all set and ready to start using Slack in your workflows.

Figure 16. Bot added